Smart contract powered checkout
Building a custom self-hosted Crypto Checkout.
Running a technical co-founder productized service agency for AI & web3 companies have always made me ask the question, "If we believe in web3, why is it not already integrated into our payment flow?" So, we built this to answer that question.


The Concept
My goal was to create a user-friendly and secure payment page that present both card and cryptocurrency payment options without relying on a third party UI. This makes it easier to copy and implement across multiple projects without sacrificing on either UX or security. EVM-compatible chains, ERC-20 standard combined with price stability of stablecoins like (USDC, USDT & DAI) makes the perfect option for this.
The Payment Journey
001
Selecting offering:
The journey begins with the user selecting the service offering. This step is crucial as it determines the amount and type of payment to be processed.
This can be customized to fit multiple implementations like one-time payment, donations, cart checkout. It depends on the nature of business and service provided.
MVP
$4,970
A few spots left
- 3 days delivery time line
- Complete Design and Development
- 24 hrs feedback loop
- One-time payment
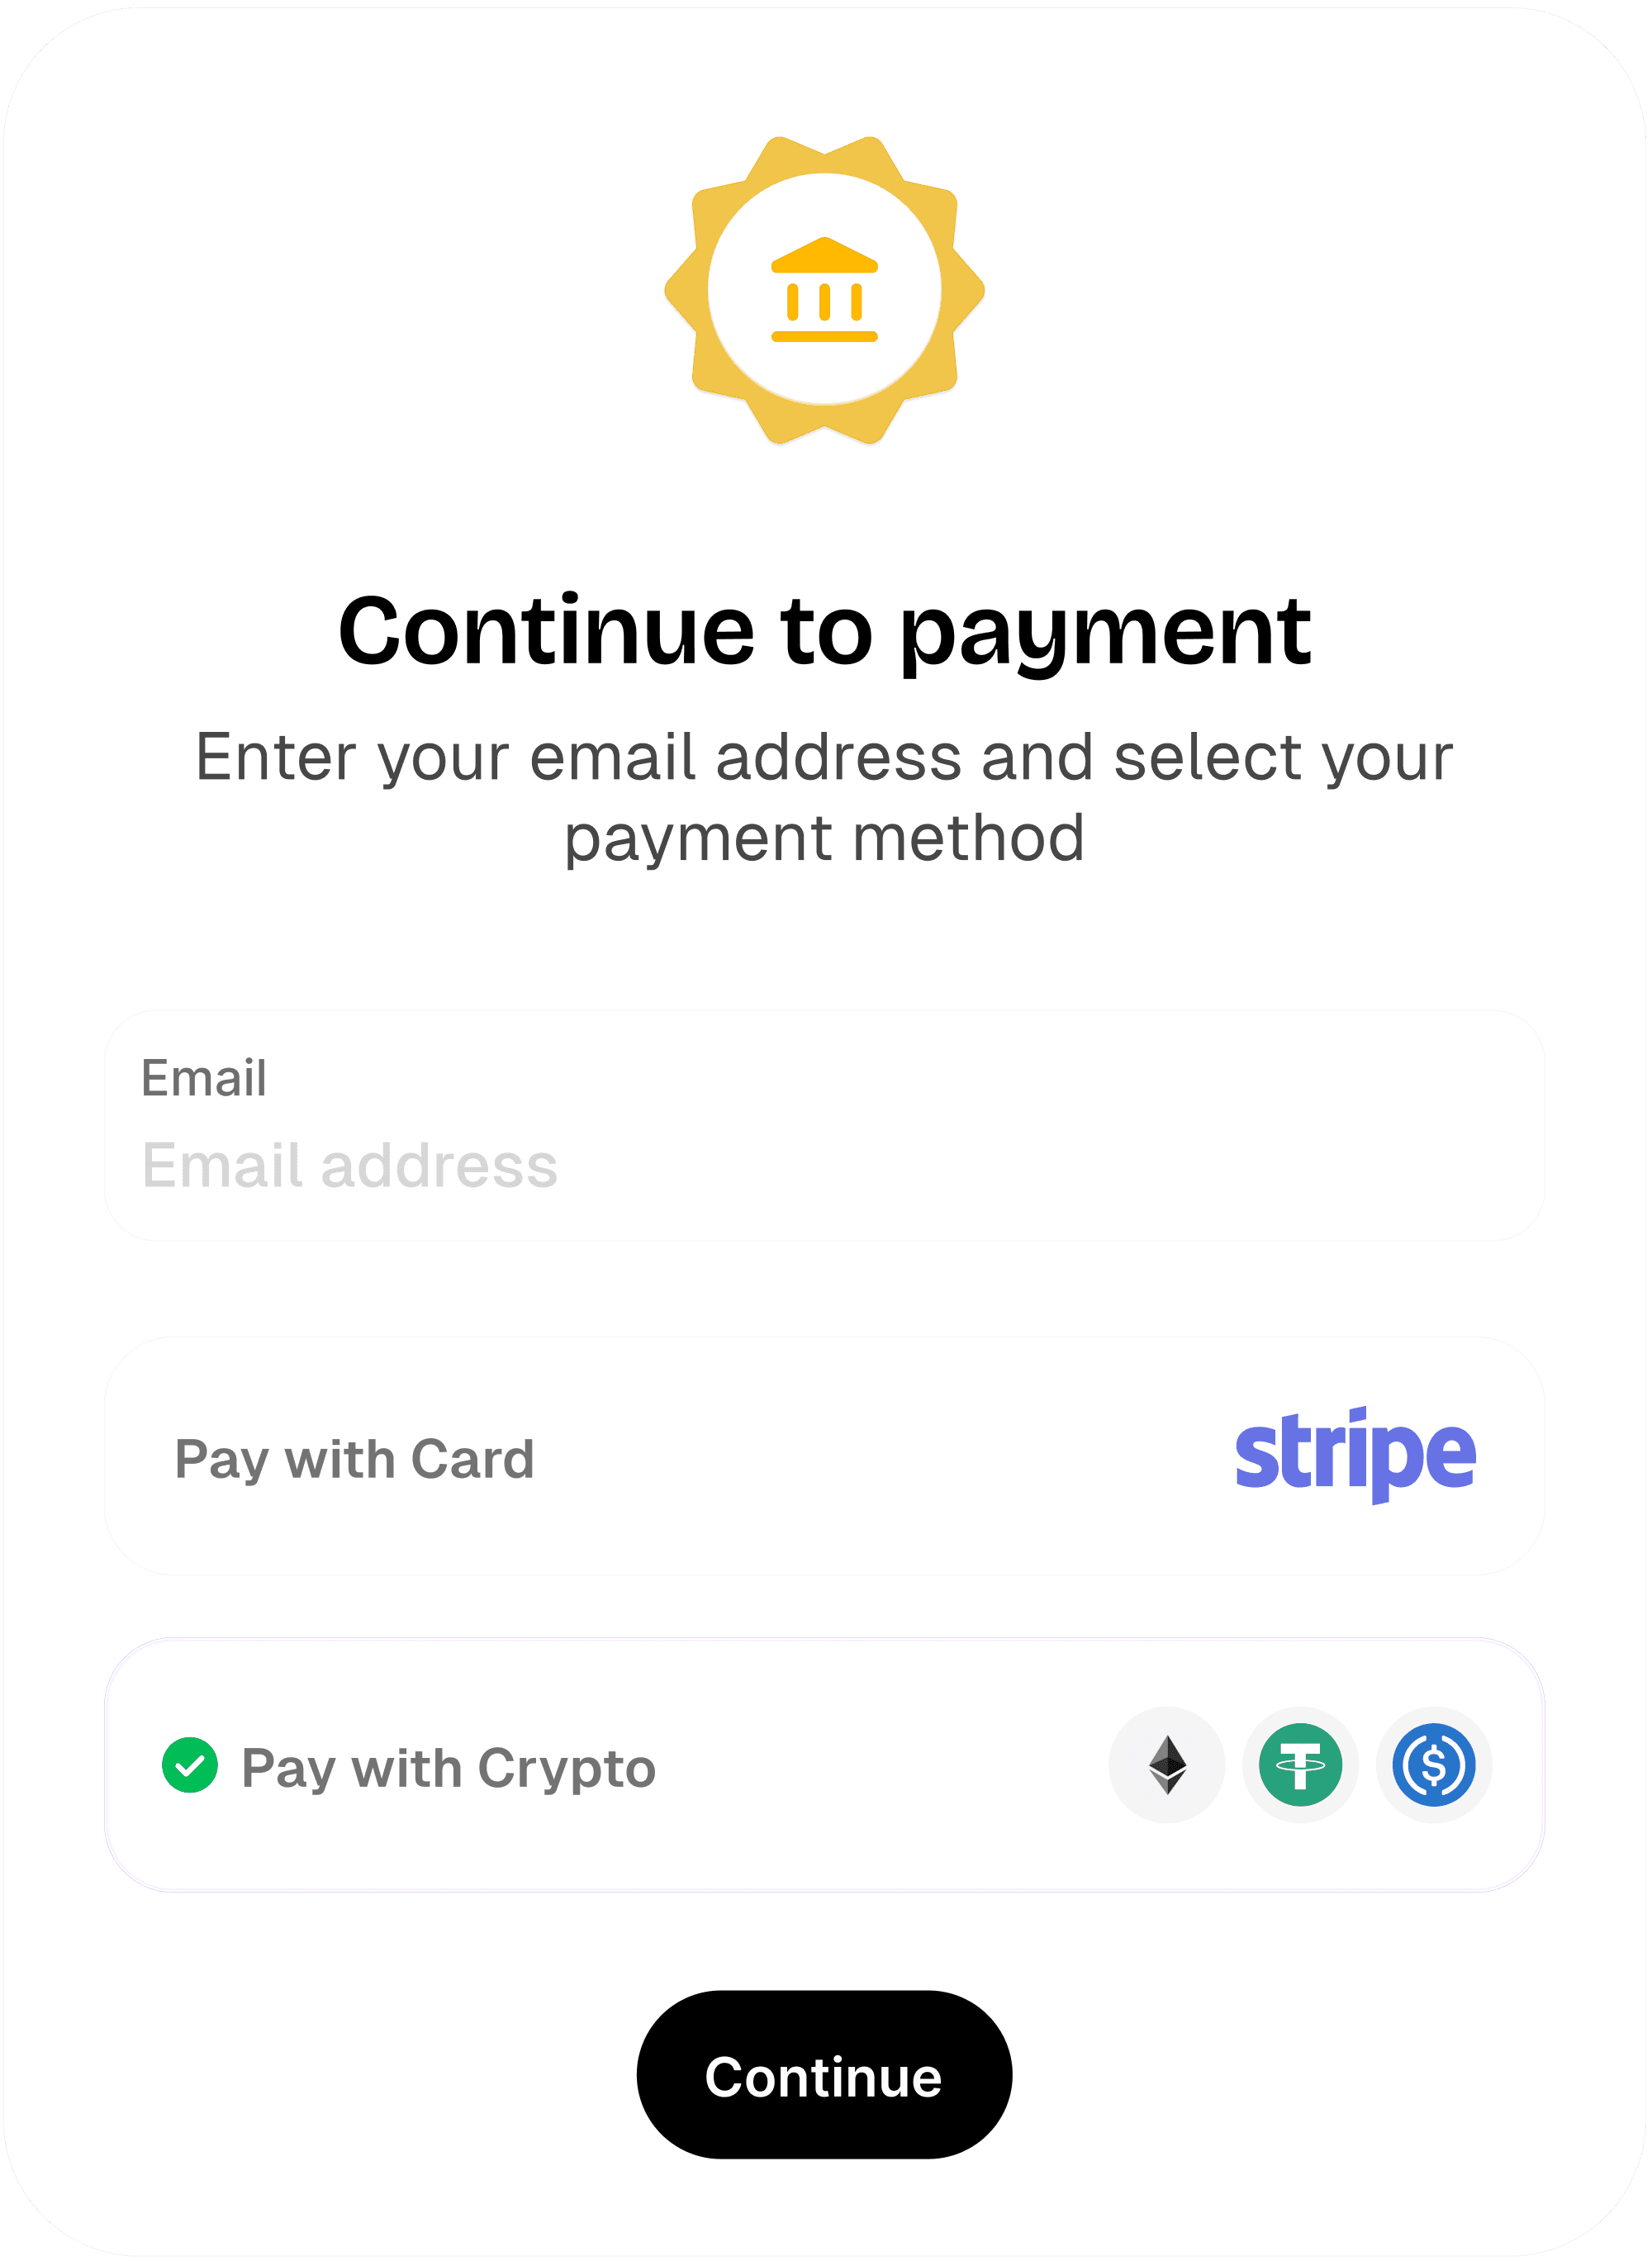
002
Choosing the Payment Method:
After selecting the payment plan, users are directed to a screen where they can choose their preferred payment method: either crypto or card. This clear design ensures a smooth and intuitive user experience.
Card Payments via Stripe: If the user opts for card payment, we use the email to generate a stripe checkout link and redirect to the Stripe hosted payment screen.
Continue to payment
Enter your email address and select your payment method
003
Connect wallet
For users choosing the crypto payment option, we present the wallet connection flow along with the price and custom message. Any EVM-compatible wallet will work, either with WalletConnect or browser wallet. Thanks to RainbowKit
Connect Wallet
You are about to make payment for:
MVP
[Description text about the option selected] We can completely customize this to fit whatever message we want to pass on before the user performs the connect wallet action.
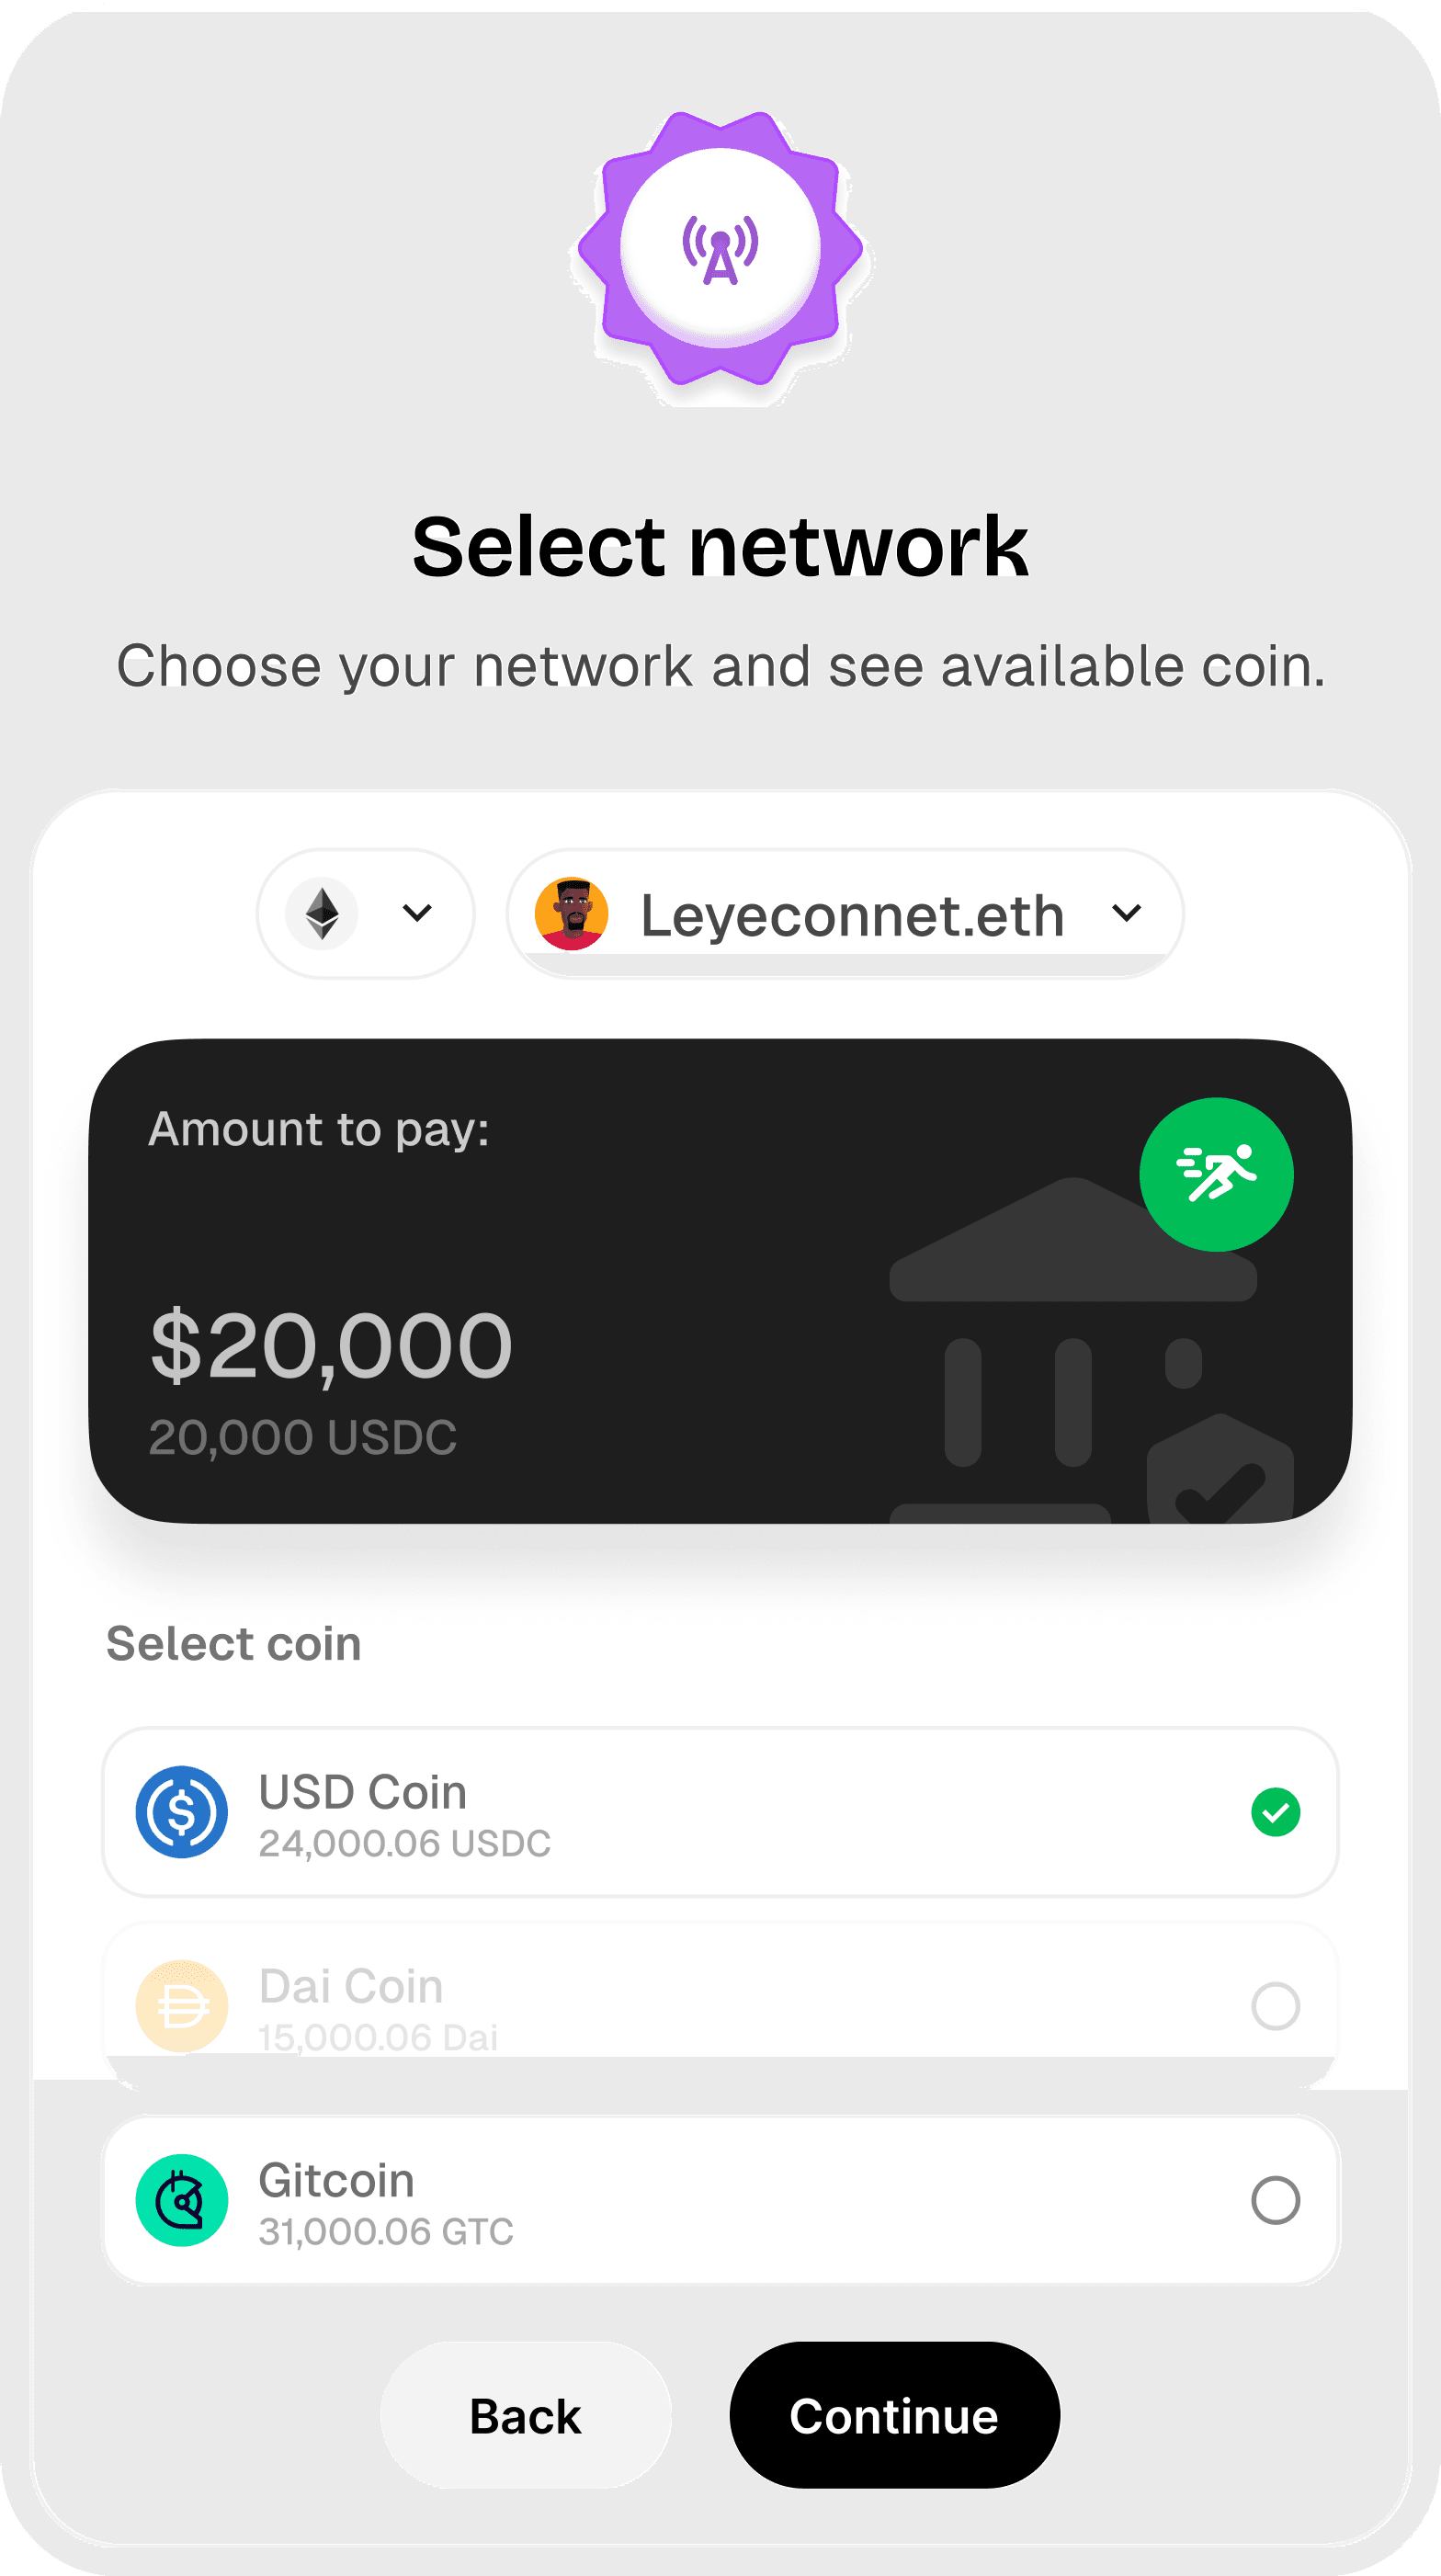
004
Select Network & Token
After connecting their wallet, users are shown a token selection screen that allows them select the token with enough balance to cover payments.
We show supported tokens alongside user balance. Supported tokens with not enough balance to cover payment is disabled. The vendor has the option to add support for other tokens.
Select network
Choose your network and see available coin.

Amount to pay:
$4,970
Select coin
USD Coin
12,348 USDC
Dai Coin
4200 DAI
Gitcoin
30,000 GTC
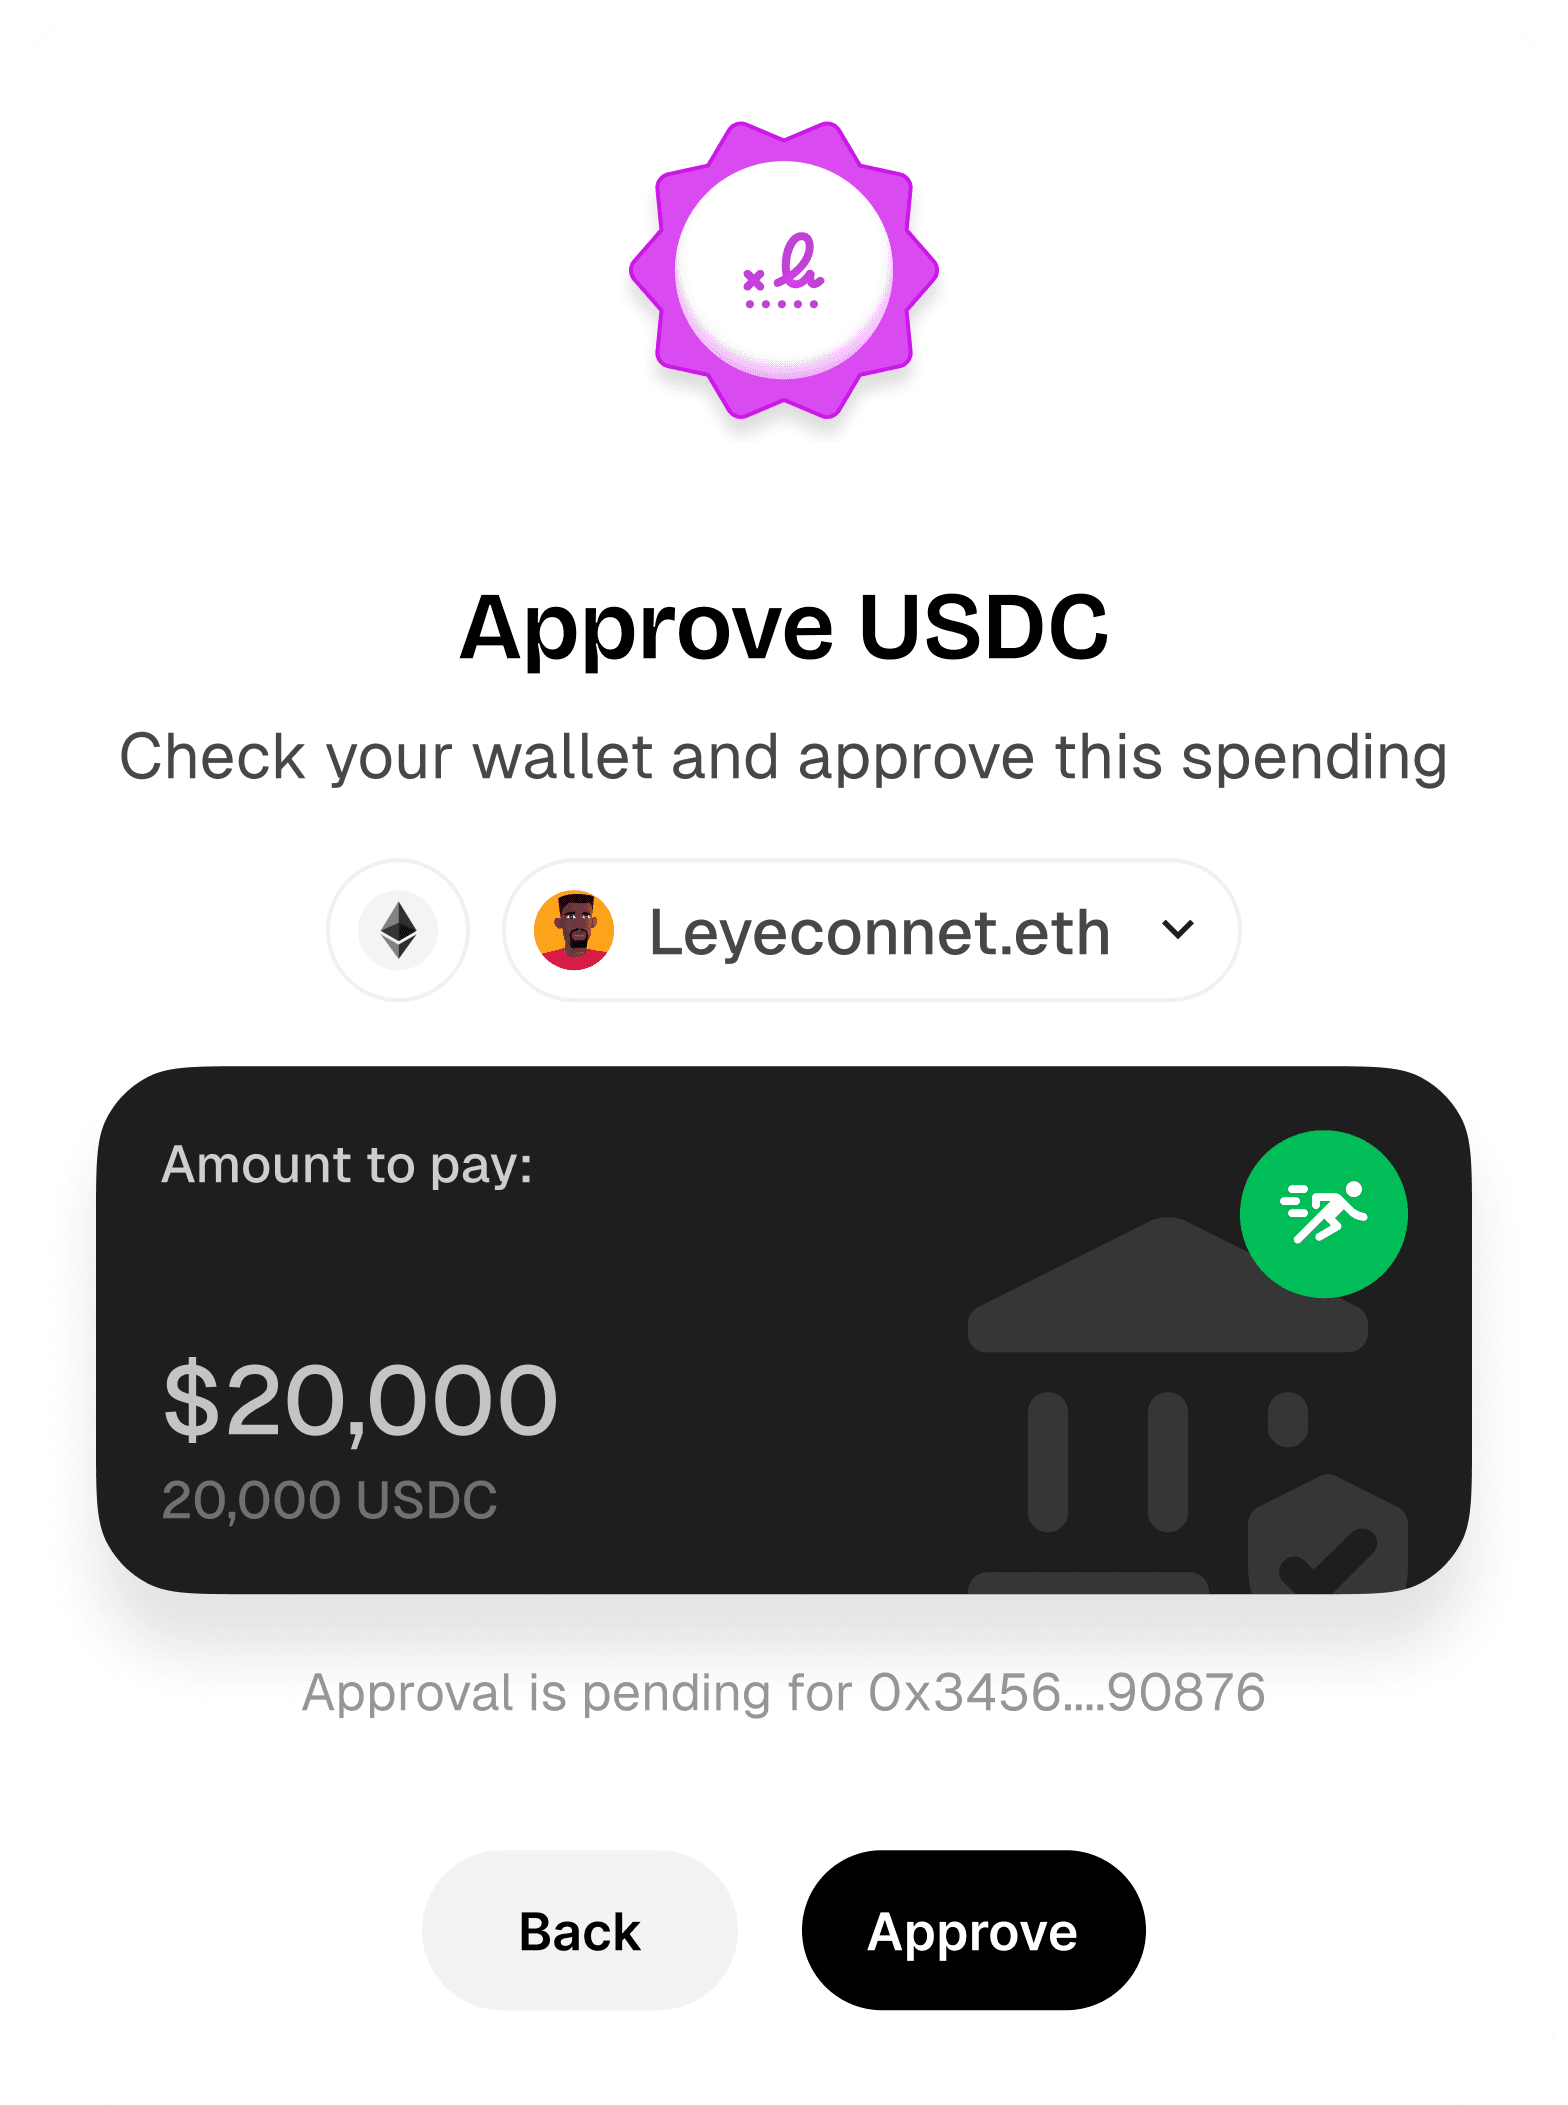
001
Approve token and complete transaction:
The journey begins with the user selecting the payment plan from my offering. This step is crucial as it determines the amount and type of payment to be processed.
006
Transaction complete
Upon successful completion of the transaction, users are directed to a success screen. This screen not only confirms the success of the payment but also shows a welcome message from me. You can then perform othre completely customizable actions by sending the transaction hash to your backend service, like send an invoice, validate the transaction and provide access to the user, etc.
Technical Implementation
If you're curious about how to build/integrate this system into your platform, here are some points to note:
- The Checkout contract: We implemented a solidity smart contract as a barell entry point for all Checkout request with a 1% fee for all tokens on it. It has a mechanism like "Hold Payment", "Pay In Native Tokens" but we ultimately only focused on stablecoins/ERC-20 as the payment token of choice. Addresses: Ethereum, Optimism & Arbitrum mainnet.
- Web3 Integrations: The UI is created using React. The web3 implementations used are RainbowKit, Wagmi and Viem for wallet and smart contract interactions.
- Transaction Status: Following the tradition of existing payment flows, you can implement a backend service that filters on the events from the Checkout contract.
- Customizability & UI design: A key focus was on designing an intuitive and user-friendly interface. With templated components from shadcn and minimal customization, the code should be easy to integrate into existing platforms. You can find all code here.
What's next?
More integrations: Mechanisms like using on-chain Oracles like ChainLink to support non-stablecoins as means of transacting, coupled with swaps on checkout will provide a more robust system. Also, considering using the base contracts and UI to build a donation module or even better, a platform for funding creators like BuyMeACoffee powered by smart contracts.
Conclusion
By building a payment page that supports both card and cryptocurrency payments, we have enhanced our service offerings and provided greater flexibility to our users (especially those building in web3). Without a need to off-ramp tokens before making payments, users can enjoy a seamless, secure, and efficient payment experience. As digital payment methods continue to evolve, we remain committed to adapting and providing the best possible service to our customers.
This was fun to build and we look forward to building more projects and ideas. Don't forget to share how/what (if any), you do with this implementation. Also open to feedback. For now, 🖖🏾.